A slow website not only frustrates visitors but also negatively impacts SEO and Core Web Vitals, especially when the page contains images, videos, and iframes.
The best solution is lazy loading, which significantly reduces the initial page load payload (often by 50–80%), as images and videos are loaded only when needed.
In this article, I’ll explain how to lazy load images, iframes, videos in WordPress, and even background images, so keep reading.

In today’s digital age, website speed is crucial. If your website is slow, visitors will leave immediately, and your SEO ranking will also be negatively affected.
In this comprehensive guide, we will show you step-by-step how to implement lazy loading in WordPress, its benefits, and which best practices you should follow.
- What Is Lazy Loading and How Does It Work?
- Why do I Need a Lazy Load Plugin?
- Lazy Load In WordPress (Quick Overview):
- How to Lazy Load Images, Iframes, and Videos in WordPress (3 Best Methods)
- Method 1: Use the Built-in Native Lazy Loading
- Method 2: Use a LazyLoad Plugin (Recommended)
- Method 3: Lazy Loading Using Code (For Developers)
- Lazy Loading for YouTube and Vimeo Videos
- Lazy Loading Best Practices
- Common Lazy Loading Problems and Solutions
- Performance Testing and Monitoring
- Advanced Lazy Loading Techniques
- WordPress Lazy Loading FAQs
- Conclusion
What Is Lazy Loading and How Does It Work?
Lazy loading means “loading gradually” or “loading only when needed,” meaning only the content of the visible area is loaded.
It’s a web optimization technique where all the resources (images, videos, iframes) of a webpage are not loaded simultaneously.
Instead, these resources are loaded only when the user scrolls to them, i.e., they become visible only when they enter the viewport.
For example:
What happens If Lazy Loading Is Not Enabled?
When a page opens, all images, videos, and iframes start loading simultaneously. In this situation, if the user closes the tab, all the loading effort is wasted because:
The user hasn’t scrolled down the page or viewed the images at the bottom, resulting in slow page loading and wasted bandwidth.
For example:
If a website page contains more than 20 images or videos, typically, when a user opens that page, all 20+ files (images, videos) load simultaneously.
What happens If Lazy Loading Is Enabled?
Now, if you use the lazy loading method, only the files that are in the viewport will be loaded initially, and the rest of the files will be loaded as the user scrolls.
This significantly reduces the initial page load time and greatly improves website performance, which is better for both users and search engine rankings.
For example:
If a page has 20+ images or videos, when a user opens the page, only the files within the viewport will load initially. The remaining files will only load when the user scrolls down.
Why do I Need a Lazy Load Plugin?
Implementing lazy loading offers several significant advantages that improve your website’s overall performance and user experience.
Here are some important benefits of lazy loading:
1. Improved Page Load Speed
According to Google’s research, 53% of mobile site visits are abandoned if pages take more than 3 seconds to load, and lazy loading improves page speed.
By initially loading only the visible content, page load times can be reduced by 50-70%, which is the biggest advantage of lazy loading.
2. Bandwidth Savings
Images and videos that the user doesn’t see will not be loaded. This saves a significant amount of bandwidth and prevents server overload.
This is especially beneficial for users with limited data plans.
3. Better User Experience
A fast-loading website improves the user experience. Users get the content quickly, can interact with it faster, and are more likely to return.
This reduces the bounce rate and increases engagement.
4. Improved SEO
Google has made page speed a ranking factor. Google now ranks faster-loading pages higher and displays them at the top of search results.
Page speed is also an important metric in Core Web Vitals. Lazy loading improves your Largest Contentful Paint (LCP) and Cumulative Layout Shift (CLS) scores.
5. Reduced Server Load
When fewer resources are loaded, the load on the server is reduced, which lowers hosting costs and makes the website more stable, especially during periods of high traffic.
Choosing a fast and reliable WordPress hosting provider also plays a major role in performance optimization, especially when combined with techniques like lazy loading.
Now you understand what lazy loading is, how it works, and why we need it.
Let’s learn about implementing lazy loading in WordPress.
Lazy Load In WordPress (Quick Overview):
Implementing lazy loading in WordPress can be a bit lengthy, and you might get confused trying to figure out which method is best for you.
Therefore, I’m adding a quick overview section here that will help you make decisions quickly.
| Feature / Method | Native Lazy Loading | Lazy Load Plugin | Manual (Code-based) |
|---|---|---|---|
| Ease of Use | Very easy | Easy | Difficult |
| Performance Impact | Medium | High | Very high |
| Level of Control | Low | Medium–High | Full |
| Browser Support | Modern browsers only | All browsers | All browsers |
| Customization | Very limited | Good | Full |
| Maintenance | None | Low | High |
| Best For | Small websites | Most WP websites | Developers |
Now, let me explain each method to you in detail.
How to Lazy Load Images, Iframes, and Videos in WordPress (3 Best Methods)
In WordPress, lazy loading images, iframes, and videos is not a very difficult task. Here, I will tell you about two very easy and overall the best methods.
You can lazy load images, iframes, and videos in WordPress using a built-in browser-native feature (automatic in WordPress 5.5+) or a dedicated optimization plugin.
Method 1: Use the Built-in Native Lazy Loading
The good news is that since WordPress version 5.5, the native lazy loading feature is built-in. Images and iframes now automatically include the loading attribute.
This native lazy loading feature was officially introduced in WordPress 5.5; you can refer to the official WordPress Core documentation for more information.
This means that you don’t need any extra plugins for basic lazy loading.
How does Native Lazy Loading Work?
By default, WordPress automatically adds the loading="lazy" HTML attribute to all images and iframes on your website.
This is browser-level lazy loading, which is now supported by modern browsers (such as Chrome, Firefox, Edge, Safari, etc.).
For example, here is the HTML code:
<img loading="lazy" src="image.webp" alt="Description">
Limitations of Native Lazy Loading:
While native lazy loading is good, but it has some limitations, such as:
- The browser handles everything itself
- Lack of advanced customization options
- You cannot control the threshold limit
- No support for placeholder images or iframes
- Older browsers don’t support native lazy loading
And most importantly:
There is no fixed threshold limit, browsers determine the limit based on the viewport size, scroll speed, and user behavior prediction.
Sometimes this limit is very low, and sometimes it’s very high, which means that images far below the viewport can also be loaded.
This means it’s only suitable for the basic level.
However, plugins are useful when you need advanced features like background image lazy loading, video placeholders, or fine-grained control.
Method 2: Use a LazyLoad Plugin (Recommended)
Many WordPress plugins offer advanced features such as lazy loading background images, videos, placeholders, and exclusions, in addition to images and iframes.
Best Lazy Loading Plugins for WordPress:
If you need these kinds of advanced features, use one of these top lazy loading plugins:
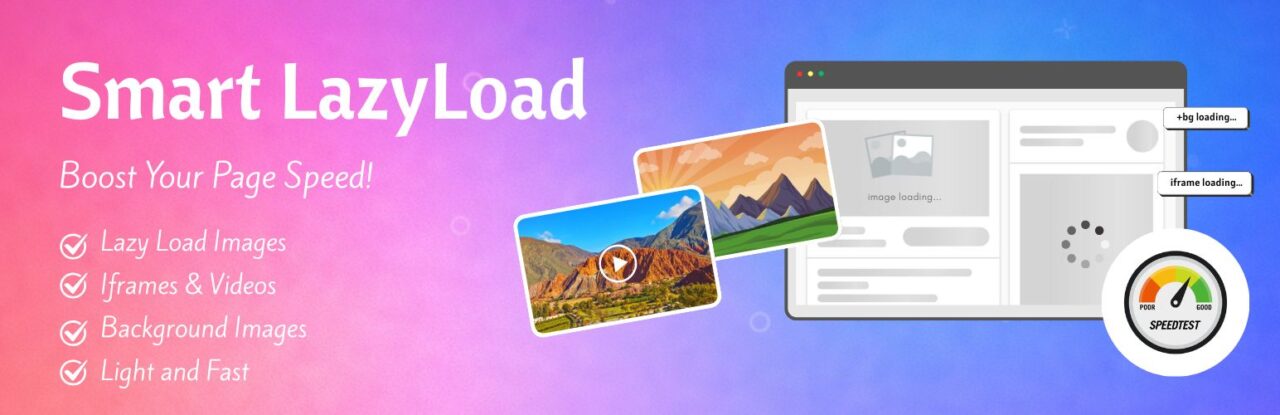
1. Smart LazyLoad (Best and Free)
This is the best lazy loading plugin, giving you the ability to lazy load WordPress images, iframes, and background images, along with other advanced features.
Smart LazyLoad plugin skips the first image, improving Core Web Vitals, and replaces the YouTube video with a thumbnail, preventing extra JavaScript from loading.
The special thing, it also supports native lazy loading, meaning that native lazy loading will work in modern browsers, and in older browsers, the plugin will lazy load the assets.
You can control the following features with this:
- Lazy Load Images and Iframes
- Lazy Load background images
- Replace YouTube video by thumbnail
- Use native lazy load (if browser support)
- Control threshold limit
- Skip first image (featured thumbnails)
- Load Inline CSS and JS file
- Disable Lazy Load for logged-in users
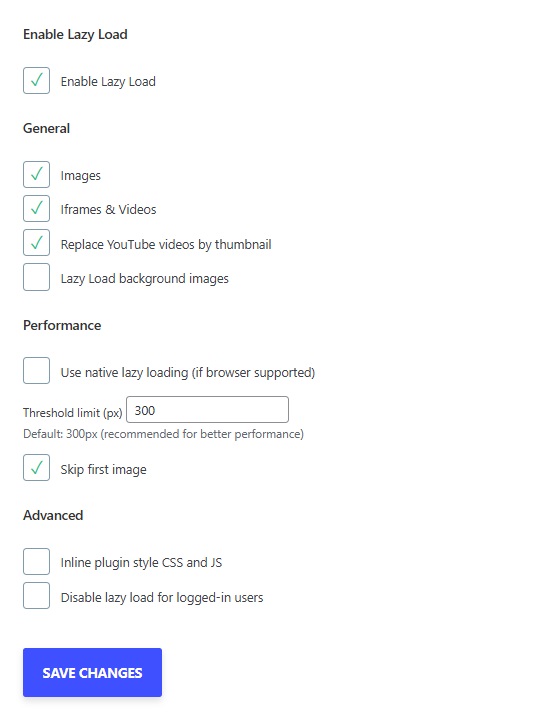
How to Setup Smart LazyLoad Plugin?
This plugin is very easy to use, with a clean and easy-to-understand settings page in the screenshot below, which only includes the essential options.
Let me explain it to you in a little more detail.
1. Enable Lazy Load
By enabling this option, you can activate the features of the Smart LazyLoad plugin. This option allows you to turn all the features on or off at once.
2. General Settings
In the plugin’s general settings, you’ll find four options that allow you to separately enable or disable lazy loading for images, iframes, and background images.
From here, you can also convert YouTube videos into thumbnails preview, so the YouTube video will only load when the user clicks on it.
3. Performance
This is a very important option of this plugin, where you can enable native lazy loading, control the threshold limit, and choose to skip the first image.
If you enable native lazy loading, images will be lazy-loaded in modern browsers using the loading="lazy" attribute, and a plugin will handle image lazy loading in older browsers.
The threshold limit is 300px by default, which is recommended for best performance, but you can change it according to your needs.
The third option allows you to skip first image, ensuring that the feature image on the page is not lazy-loaded, which prevents negative impact on CLS/performance.
4. Advanced (Optional)
This option allows you to load the plugin’s lightweight lazy loading script and style inline, which reduces extra HTTP requests.
And if you wish, you can disable lazy loading for logged-in users from here.
Additional Features of Smart LazyLoad Plugin
These are the main options of this plugin. In addition to these, the plugin also offers some extra features, which are as follows:
1. Custom Placeholder
This plugin allows you to use different custom placeholders for images and iframes. You can use mozedia_svg_placeholder for images and mozedia_lazyload_placeholder for frames.
For example, add this code to your functions.php:
// Image placeholder
add_filter( 'mozedia_svg_placeholder', function () {
	return 'data:image/svg+xml,<svg xmlns="http://www.w3.org/2000/svg" viewBox="0 0 1 1"></svg>';
});

// Iframe placeholder
add_filter( 'mozedia_lazyload_placeholder', function () {
	return 'about:blank';
});
2. Disable Lazy Load for Specific Page
If you need to disable lazy loading for a specific page or post, use filters like these.
add_filter( 'do_mozedia_lazyload', '__return_false' );
Or conditionally disable it:
add_action( 'wp', 'disable_mozedia_lazyload' );
function disable_mozedia_lazyload() {
	if ( is_single() ) {
		add_filter( 'do_mozedia_lazyload', '__return_false' );
	}
}
3. Disable Lazy Load for Specific Image
Simply add a data-no-lazy="1" attribute in your <img> or <iframe> tag, or you can use any of the attributes or classes listed below in the element:
no-lazyloaddata-no-lazydata-skip-lazyskip-lazy
You can also use the mozedia_lazyload_excluded_attributes filter to exclude specific attributes from lazy loading images.
For iframes, use the mozedia_lazyload_iframe_excluded_patterns filter to exclude specific iframe sources.
4. SEO Friendly
This plugin protects the original content using a NoScript fallback and follows the best practices recommended by search engines.
5. Manual Control for Images
If any of your images or background images are not lazy loading, you can apply it manually yourself.
Simply add this specific markup to the element on which you want to apply lazy loading:
// For normal image
<img class="mll-lazyload" src="/image-slug.jpg" />

// For background images
<div class="mozedia-lazyload" data-bg="url(../img/image-slug.jpg)"></div>
That’s it, as you can see, the smart lazyload plugin only provides lazy loading features; it doesn’t include any other extra coding.
Besides this plugin, several other lazy loading plugins are also available. If you need features beyond what this plugin offers, you can use them.
2. Lazy Load by WP Rocket
This lazyload plugin doesn’t offer many options, because advanced features are available in the paid version only, but it’s enough for basic lazy loading.
Rocket lazy load plugin (created by the WP Rocket) that provides only lazy loading functionality. It offers lazy loading for images, videos, and iframes.

In addition, with the free version you can only convert YouTube videos into thumbnails. If you also need a cache plugin, you can use its paid version.
The main features of WP Rocket:
- Lazy loading for images, iframes, and videos
- Thumbnail preview for YouTube videos
- Option to exclude specific images
- Automatic WebP image conversion
- One-click setup – very easy configuration
- Price: $59/year (single site)
If you need a powerful caching solution along with a lazy loading, then you should use this paid plugin. It provides all the necessary features.
3. a3 Lazy Load (Advanced)
This plugin also provides lazy loading features similar to the Smart Lazy Load plugin mentioned above, the only difference being that it offers some extra features.

a3 Lazy Load is a powerful free plugin that offers many advanced customization options and supports, such as:
- CDNs (like JetPack Accelerator)
- Accelerated Mobile Pages (AMP)
- and WooCommerce
If you use heavy plugins like JetPack, EWWW Image Optimizer, Imagify, WordPress AMP, and WooCommerce, then this plugin is best for you.
4. Smush Image Optimization
This is primarily an image optimization plugin, but it also includes a powerful lazy loading feature to lazy load WordPress images, iframes, and videos.
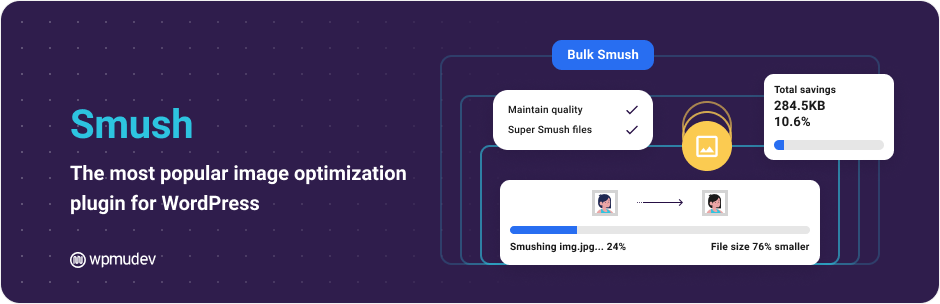
Smush Image Optimization especially useful for websites where images are heavy and maintaining both performance and image quality is crucial.
Smush Pro’s Key Features:
- Lazy loading support for images and iframes
- Automatic image compression (without quality loss)
- WebP image conversion support
- Built-in CDN integration for faster image loading
- Suitable for large and high-traffic websites
- Price: $49/year (single site)
This is a better option when you need both image optimization and lazy loading, and advanced features like WebP and CDN are essential.
5. LiteSpeed Cache
This is a comprehensive caching plugin that is completely free and known for its powerful WordPress performance optimization capabilities.

In addition to caching, LiteSpeed Cache plugin also offers excellent lazy loading features, which are particularly effective for large and dynamic websites.
LiteSpeed Cache’s Lazy Load Features:
- Lazy loading for images, iframes, and background images
- Advanced viewport calculation, ensuring content loads at the right time
- Built-in image optimization features
- Enhanced performance with server-level optimizations
This plugin is the best option when your website is hosted on a LiteSpeed server and you need both caching and lazy loading in a single plugin.
Note: LiteSpeed Cache works best only on LiteSpeed or OpenLiteSpeed servers. On Apache or Nginx, many features will not work.
Method 3: Lazy Loading Using Code (For Developers)
If you don’t want to use a plugin or need a custom implementation, you can also add lazy loading through code, this option is for developer-level users.
1. Native Browser Lazy Loading
The easiest way to lazy load WordPress images, iframes, and videos, and background images is to add the loading lazy attribute.
Add this code to your theme’s functions.php file:
function mozedia_lazy_loading_images($content) {

    if (is_singular() && !is_admin()) {
        $content = preg_replace('/<img /','<img loading="lazy" ', $content);
    }

    return $content;
}

add_filter('the_content', 'mozedia_lazy_loading_images');
2. JavaScript Library (Vanilla LazyLoad)
Vanilla LazyLoad is a popular JavaScript library that provides advanced lazy loading.
Step 1: Add the LazyLoad library
Add the following lazy load library code to your theme’s header.php file, before the closing </head> tag, you can also add in <body> section.
<script src="https://cdn.jsdelivr.net/npm/vanilla-lazyload/dist/lazyload.min.js"></script>
Step 2: Add a Class to the Images
Add this code to functions.php:
function mozedia_modify_images_for_lazyload($content) {

    if (is_singular() && !is_admin()) {

        // Replace src with data-src
        $content = preg_replace('/<img(.*)src=/','<img$1data-src=', $content);

        // Add lazyload class
        $content = preg_replace('/<img(.*?)class="(.*?)"/','<img$1class="$2 lazy"', $content);

        // For images without class
        $content = preg_replace('/<img((?:(?!class=).)*?)>/','<img$1 class="lazy">', $content);
    }

    return $content;
}

add_filter('the_content', 'mozedia_modify_images_for_lazyload');
3. Intersection Observer API
This is a native API of modern browsers and is very efficient. Add this code to your WordPress theme’s JavaScript file:
document.addEventListener("DOMContentLoaded", function() {
    let lazyImages = [].slice.call(document.querySelectorAll("img.lazy"));

    if ("IntersectionObserver" in window) {
        let lazyImageObserver = new IntersectionObserver(function(entries, observer) {
            entries.forEach(function(entry) {
                if (entry.isIntersecting) {
                    let lazyImage = entry.target;
                    lazyImage.src = lazyImage.dataset.src;
                    lazyImage.classList.remove("lazy");
                    lazyImageObserver.unobserve(lazyImage);
                }
            });
        });

        lazyImages.forEach(function(lazyImage) {
            lazyImageObserver.observe(lazyImage);
        });
    }
});
Next, you will need to add the data-src attribute to your images; to add them to the images, use the method described in the second step.
For more information on implementing the Intersection Observer API, you can read Mozilla’s official MDN Web documentation.
Lazy Loading for YouTube and Vimeo Videos
Embedded videos can significantly slow down page load time. Lazy loading them is crucial. You can try the following methods.
1. Best Practices for YouTube Videos
Replace YouTube videos with a thumbnail image, and load the video only when clicked. This saves 500KB-1.5MB on the initial page load.
This happens automatically with smart lazy loading and the WP Rocket plugin.
For manual implementation:
<div class="mozedia-youtube-player" data-id="VIDEO_ID">
    <img src="https://img.youtube.com/vi/VIDEO_ID/maxresdefault.jpg" alt="Video thumbnail">
    <div class="play-button"></div>
</div>

<script>
document.querySelectorAll('.mozedia-youtube-player').forEach(function(player) {
    player.addEventListener('click', function() {
        let iframe = document.createElement('iframe');
        iframe.setAttribute('src', 'https://www.youtube.com/embed/' + this.dataset.id + '?autoplay=1');
        iframe.setAttribute('frameborder', '0');
        iframe.setAttribute('allowfullscreen', '1');
        this.innerHTML = '';
        this.appendChild(iframe);
    });
});
</script>
2. For Vimeo Videos
Similar approach for Vimeo:
<div class="mozedia-vimeo-player" data-id="VIDEO_ID">
    <img src="https://i.vimeocdn.com/video/VIDEO_ID_1280x720.jpg" alt="Video thumbnail">
    <div class="play-button"></div>
</div>
3. Self-hosted Videos
Use preload=”none” attribute for self-hosted videos:
<video preload="none" poster="thumbnail.jpg" controls>
    <source src="video.mp4" type="video/mp4">
</video>
This prevents the video from loading immediately.
Lazy Loading Best Practices
To maximize the benefits and avoid negative effects, follow these best practices when implementing lazy loading in your WordPress website:
1. Exclude Above-the-Fold Images
Images that are visible on the initial screen (viewport) should not be lazy loaded. Doing so can negatively impact the Largest Contentful Paint (LCP) score.
Always exclude logos, hero images, and images in the first section.
Example exclusions:
- Website logo
- Hero section images
- Header background images
- The first 2-3 blog post thumbnails
2. Use Placeholder Images
Display a placeholder image while images are loading. This prevents layout shifts and provides a better user experience.
You can use low-quality image placeholders (LQIP) or solid color backgrounds.
3. Define Width and Height Attributes
Always add width and height attributes to every image tag.
This allows the browser to reserve space and avoids Cumulative Layout Shift (CLS).
<img src="image.jpg" loading="lazy" width="800" height="600" alt="Description">
4. Set a Proper Threshold
Start loading images slightly before they enter the viewport. This ensures a smooth user experience.
A threshold of 200-300px is usually a good starting point.
5. Test on Different Devices
Test lazy loading on all devices: desktop, mobile, and tablet. The viewport is smaller on mobile devices, so you may need to adjust the threshold accordingly.
6. Add Alt Text for SEO
Lazy loading shouldn’t negatively impact SEO. Make sure to add proper alt text to every image. You can SEO plugin like Yoast SEO plugin, here is the detailed guide.
Google’s crawlers index lazy-loaded images as well.
7. Check Browser Compatibility
Native lazy loading (loading=”lazy”) works in all modern browsers, but provide a fallback for older browsers.
JavaScript-based solutions automatically provide a fallback.
8. Use a CDN (Content Delivery Network)
Using a CDN (Content Delivery Network) with lazy loading will help images load faster.
You can use CDN services like Cloudflare, BunnyCDN, or StackPath.
9. Optimize Images
Beyond lazy loading, image optimization plays a crucial role in performance and SEO.
Follow these best practices:
In addition to lazy loading, optimize your images:
- Use modern formats such as WebP for images and SVG for icons
- Compress images effectively; prefer JPG over PNG for photographs
- Make responsive images using
srcsetto serve the right size for each device - Remove unnecessary metadata to reduce file size
For a deeper dive, this article will help:
10. Monitor Performance Regularly
Regularly check your site’s performance using tools like Google PageSpeed Insights, GTmetrix, and WebPageTest.
Pay attention to Core Web Vitals metrics.
To understand Core Web Vitals and Google search results, you can refer to official guidelines on Core Web Vitals, where you’ll find complete information.
To make sure Google can crawl and index lazy-loaded content like images and iframes properly, follow the Google Search Central guidance on fix lazy-loaded content.
Common Lazy Loading Problems and Solutions
When implementing lazy loading in WordPress, you might encounter some common problems. Here are their solutions.
1. Images are not loading
Possible Causes – JavaScript errors, Plugin conflict, or Incorrect implementation.
Open the browser console (F12) to check for errors, and temporarily deactivate all plugins one by one to see if that resolves the issue.
2. Layout Shift is occurring
The content jumps when images load. Add width and height attributes to each image, use aspect ratio boxes, and set a min-height in CSS.
3. SEO Impact
Modern lazy loading methods (loading=”lazy” or IntersectionObserver) are SEO-friendly. If you don’t like the plugin, use native lazy loading.
Concern that lazy loading will affect SEO, but now Google’s crawlers can index lazy-loaded images, just make sure you use proper alt text and image sitemaps.
4. Slow Loading on Scroll
Images are loading slowly while scrolling. Increase the loading threshold (300-500px), optimize images, use a CDN, and improve server response time.
5. Issues on Mobile
If lazy loading is not working correctly on mobile devices, use a smaller threshold for mobile, properly handle touch events, and test on real mobile devices.
Performance Testing and Monitoring
After implementing lazy loading in WordPress, it’s essential to measure performance. Use the following tools for this purpose:
1. Google PageSpeed Insights
This is a free Google tool that provides a comprehensive performance analysis, you need to go to the pagespeed.web.dev website and enter your website’s URL.
This tool displays scores for both mobile and desktop, including First Contentful Paint (FCP), Largest Contentful Paint (LCP), Cumulative Layout Shift (CLS), and Total Blocking Time (TBT) reports.
2. GTmetrix
GTmetrix provides detailed waterfall charts that show which files are loading and when. This is very useful for checking the effectiveness of lazy loading.
3. WebPageTest
With WebPageTest, you can test your site from different locations and devices. It also provides a filmstrip view that shows how the page is loading.
4. Browser DevTools
Use the Network tab in Chrome DevTools:
- Press F12
- Open the Network tab
- Refresh the page
See which images are loading initially and which ones load upon scrolling.
5. Real User Monitoring (RUM)
Enable the Web Vitals report in Google Analytics 4.
This shows actual experience data from real users, not just lab data. This is the most accurate performance measure.
Advanced Lazy Loading Techniques
In addition to basic lazy loading, there are some advanced techniques that can further improve performance.
1. Progressive Image Loading (LQIP)
The Low Quality Image Placeholder (LQIP) technique first loads a blurred, low-quality version, followed by the full-quality image.
This is used by sites like Medium and Pinterest. This gives the user the feeling that the site is fast.
2. Dominant Color Placeholders
Before the image loads, show its dominant color in the background. This is used by Google Images.
Techniques like BlurHash or ThumbHash are popular for this.
3. Conditional Lazy Loading
Change the lazy loading behavior based on network speed.
Perform more aggressive preloading on fast connections. This can be implemented using the Network Information API.
4. Priority Hints
Use the fetchpriority attribute to tell the browser which images are more important.
<img src="hero.jpg" fetchpriority="high" loading="eager">

<img src="below-fold.jpg" fetchpriority="low" loading="lazy">
5. Adaptive Loading
Serve different quality images based on the user’s device capabilities (CPU, memory, network). Provide smaller images to low-end devices.
The React Adaptive Loading library is useful for this purpose.
WordPress Lazy Loading FAQs
Users often have common questions about lazy loading, such as whether it affects SEO, whether the first image should be lazy-loaded, and which method or plugin is best for WordPress.
The FAQs below provide clear and practical answers to these questions, so you can implement lazy loading correctly on your website without any confusion.
Does Lazy Loading Affect SEO?
No. Modern lazy loading techniques like loading="lazy" and Intersection Observer are SEO-friendly.
Google can crawl and index lazy-loaded images if the correct HTML markup and alt text are used.
Should I Lazy Load the First Image on the Page?
No. Above-the-fold images like hero images and logos should not be lazy loaded.
This is because it can negatively impact Largest Contentful Paint (LCP).
Is Native Lazy Loading Sufficient for a WordPress Website?
Native lazy loading is sufficient for basic use, especially if your site doesn’t have too many images.
However, for advanced features like background image lazy loading, video placeholders, and threshold control, a plugin is recommended.
Which is the Best Lazy Loading Plugin for WordPress?
It depends on your needs. Lightweight plugins like Smart LazyLoad are ideal for focused lazy loading and are free.
While full optimization plugins like WP Rocket or LiteSpeed Cache are better for performance-heavy websites.
Can Lazy Loading cause Layout Shifts (CLS)?
Yes, if the width and height attributes are not defined, CLS problems can occur. To prevent layout shifts, always specify image dimensions or use CSS aspect ratios.
Does Lazy Loading Work on Mobile Devices?
Yes. Lazy loading works well on mobile devices, but you may need to adjust the loading threshold due to the smaller viewport.
Conclusion
Lazy loading is an essential web optimization technique that should be implemented on every website. It reduces page load time and improves the overall user experience.
Google prefers fast-loading websites, so lazy loading will also improve your SEO ranking. If you want to learn more ways to improve your website’s performance, read this.
However, WordPress 5.5+ has native lazy loading built-in, but for advanced lazy loading features, you can use plugins like Smart LazyLoad.
Manual implementation is also possible if you are technically inclined.
Always remember, simply enabling lazy loading is not enough. There are other things you need to consider when implementing lazy loading.
For example, excluding above-the-fold images, using proper placeholders, and defining width/height attributes are also crucial.
If you are not already using lazy loading, implement it today, and also perform regular performance monitoring and pay attention to Core Web Vitals.
You will see an immediate improvement in your website speed.
If you have any questions or need help, please ask in the comments section below.
We are here to help you!